
Silicone Suction Plate Loses Suction: Why?
A factory-side troubleshooting route for finding why a suction plate releases early, which variables to test, and what buyers should approve before production.
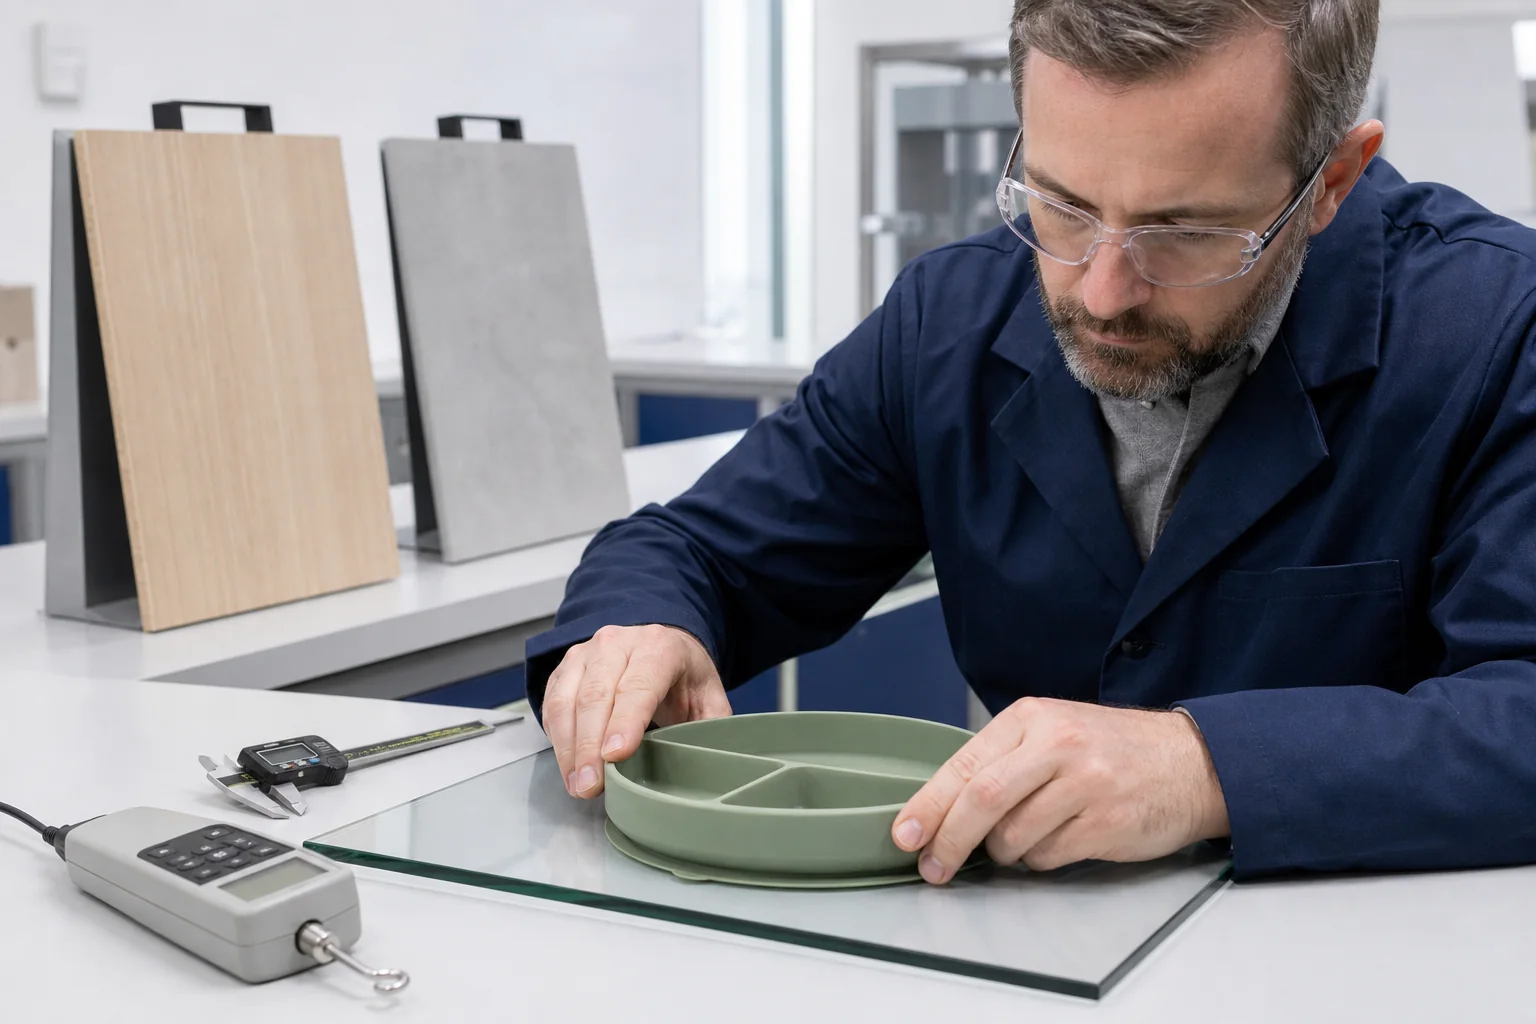
Quick Answer: When a silicone suction plate loses suction, the usual cause is an incomplete or leaking seal created by table texture, crumbs, moisture, warped contact surfaces, base geometry, stiffness or molding variation. Diagnose it by controlling the table panel, cleaning condition, application method, dwell time and pull direction before deciding whether the problem is user setup or product design.
Suction is not a permanent adhesive bond. The base must displace air, keep its sealing lip in continuous contact and resist a leak path while the plate is pushed, loaded, warmed and pulled from different directions.
For B2B buyers, the practical implication is to approve grip on named representative surfaces with a repeatable method, not with one dramatic showroom demonstration. Review the intended product range through custom silicone product capability, or send sample photos and table details for an initial factory diagnosis.
This guide explains mechanical troubleshooting and procurement controls rather than promising identical grip on every household surface. A buyer should define reasonable use instructions and acceptance criteria for its channels, claims and foreseeable environments.
Factory Insider takeaway: Start with the seal system: plate, surface, cleanliness, application and load. Change one variable at a time, record release mode and timing, and escalate to design or process review only after the use setup is controlled. Preserve the test panel, sample identity and failure mode with every decision.
First Ask Where the Suction Plate Loses Grip
Begin with the actual support surface because a suction base cannot compensate for every texture or shape. Smooth glass, sealed stone and uniform laminate often allow a continuous edge seal, while coarse wood grain, grout lines, deep texture and curved trays can leave microscopic or visible air paths.
Check flatness across the full sealing diameter rather than judging the table by eye. A shallow ridge, placemat edge, embossed finish or joint beneath one part of the lip can make the plate feel attached at first and then release as air enters slowly.
Contamination changes the interface in different ways. Crumbs can hold the lip open, oil can let the base slide and roll, and a film of detergent or polish can make a clean-looking surface behave unlike the buyer’s reference panel.
Moisture is not a universal fix. A very light film may help some designs conform during a demonstration, but excess water can promote sliding, hide poor dry performance or create an instruction that consumers will not follow consistently.
Observe how the seal fails, not only whether it fails
Record whether the plate slides sideways, peels from one edge, lifts vertically, rocks under load or releases after a delay. Each mode points to different variables: friction, lip continuity, base stiffness, center deflection, load position or a slow leak path.
Listen and watch for progressive edge lift during the dwell period. A plate that releases instantly may never form a full seal, while one that holds briefly and then pops free may have local texture, deformation or a vent path that expands under stress.
Control How the User Creates the Initial Seal
A suction base normally needs downward pressure near the center or across the intended activation zone to displace air and flatten the lip. Pressing only on the rim or placing a heavily loaded plate without activation may leave the center cavity insufficiently evacuated.
Application force should be practical and consistent with the target user. A design that grips only after an adult applies exceptional force may pass an internal demonstration yet fail in retail use, childcare settings or repeated mealtimes.
The release tab must remain outside the compressed sealing region and should not be trapped beneath the plate. If the tab folds under the lip, contacts a raised table feature or is pulled accidentally, it can create the same air path used for intentional release.
Load placement also matters after attachment. A tall cup, divided meal or child pushing near one edge creates a moment that can peel the lip even when a straight vertical pull appears strong.
Define a setup sequence that buyers can reproduce
Write a short method: clean and dry the named panel, condition the plate, place it without twisting, apply pressure at the specified zone for a set time, wait, add the defined load and apply the chosen pull. Train evaluators to use that sequence before comparing samples.
Then test realistic deviations such as a lighter press, off-center load and repeated repositioning. The goal is not to manufacture a perfect laboratory result but to understand how much operating margin the design provides around normal use.
Inspect the Sealing Lip for Continuous Contact
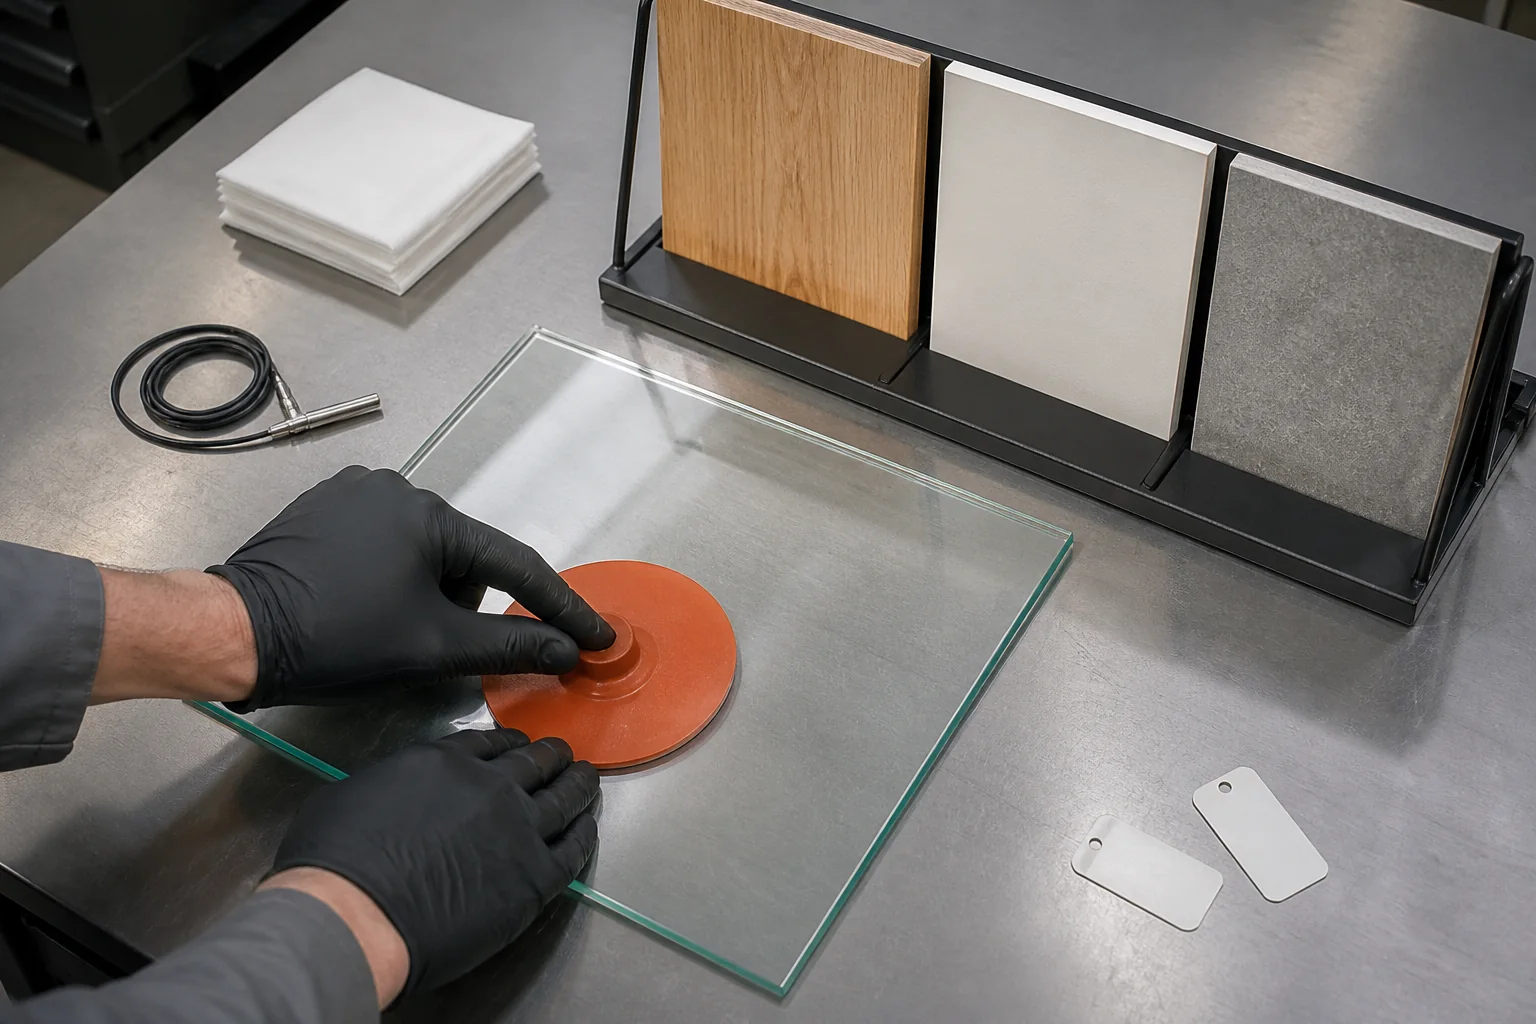
The sealing lip is the boundary that must remain in contact while the base flexes. Inspect it under low-angle light for nicks, flash, parting-line steps, dents, waviness, contamination and local thickness changes that could interrupt the contact path.
Place the relaxed plate on a flat reference panel without pressing and look for daylight or uneven contact around the circumference. A lip that touches in only a few high spots may require too much activation force or may leak when the product warms and relaxes.
Check the transition between the base membrane and lip. An abrupt thickness change can make the edge too rigid to follow small surface variation, while an overly thin or soft lip may roll, wrinkle or be displaced by lateral force.
Mold venting and trimming decisions can affect the exact surface that must seal. The broader silicone molding defect guide helps buyers distinguish cosmetic evidence from flash, short fill or distortion that can alter function.
Compare the complete circumference across multiple samples
Do not select only the best-looking unit. Rotate samples on the same panel, mark the first lift location and compare whether failures cluster around one mold feature, cavity, trimming point or packaging direction.
A consistent weak location suggests a design or tooling relationship, while random locations may indicate handling, surface debris or broader flatness variation. Preserve failed samples and photographs so the factory can connect the symptom to measurement and production history.
Evaluate Base Geometry and Silicone Stiffness Together
A larger suction diameter can create more theoretical holding force, but diameter alone does not predict real grip. The useful pressure difference exists only over the area that remains sealed, so a wide base with a leaking lip may perform worse than a smaller, well-controlled geometry.
Measure lip diameter, cavity depth, membrane profile, wall thickness, transition radius and release-tab position on the approved sample. These features determine how much air is displaced, how evenly the edge loads and how readily the base conforms to small surface variation.
Silicone hardness and section thickness work as one structural system. A harder or thicker base may resist collapse but demand more activation force, while a softer or thinner base may conform easily yet roll, creep or peel when the load moves toward an edge.
Use the silicone Shore hardness guide to specify measurement conditions and interpret hardness alongside geometry. A single Shore value cannot explain suction if wall thickness, post-cure condition and base profile differ.
Measure the geometry in both relaxed and activated states
Profile the base on a flat plate before pressure, during activation and after the load has been removed. The comparison shows whether the membrane creates a useful cavity, whether the lip stays flat and whether permanent set changes the next application.
Inspect multiple mold cavities and positions rather than one development sample. Tool temperature, fill, cure, demolding and trimming can shift the geometry enough to change activation force or leak rate without producing an obvious cosmetic reject.
Test Temperature, Load and Repeated Repositioning
Grip can change when a warm plate, hot food or recently washed product reaches the table. Temperature affects silicone compliance, trapped air, surface moisture and the behavior of finishes or films on the supporting panel, so the test should match the buyer’s stated use.
Condition both the plate and table panel, then record their temperatures at application. Do not transfer a hot sample onto an unrecorded cold surface and describe the result only as heat resistance, because the observed release may come from the combined seal system.
Add the commercial load after attachment and distribute it as consumers are likely to do. A centrally placed mass mainly tests vertical resistance, while food compartments, utensils or a child pushing the rim introduce off-axis moments that initiate peeling.
Repeat attachment and release on the same sample to observe contamination, fatigue, temporary set and handling damage. Include washing and complete drying when those steps are part of the intended use, and document any residue from detergents or rinse aids.
Separate immediate holding force from useful dwell time
A high pull value measured seconds after activation does not prove the plate will stay attached throughout a meal. Define observation points such as initial seal, five minutes, thirty minutes and the end of the intended use period, with no hidden re-pressing between checks.
Record the failure mode at every interval rather than only the final pass or fail. Slow edge leakage, progressive sliding and sudden release under a side load reveal different design margins and require different corrective actions.
Separate Setup Effects from a Product Defect
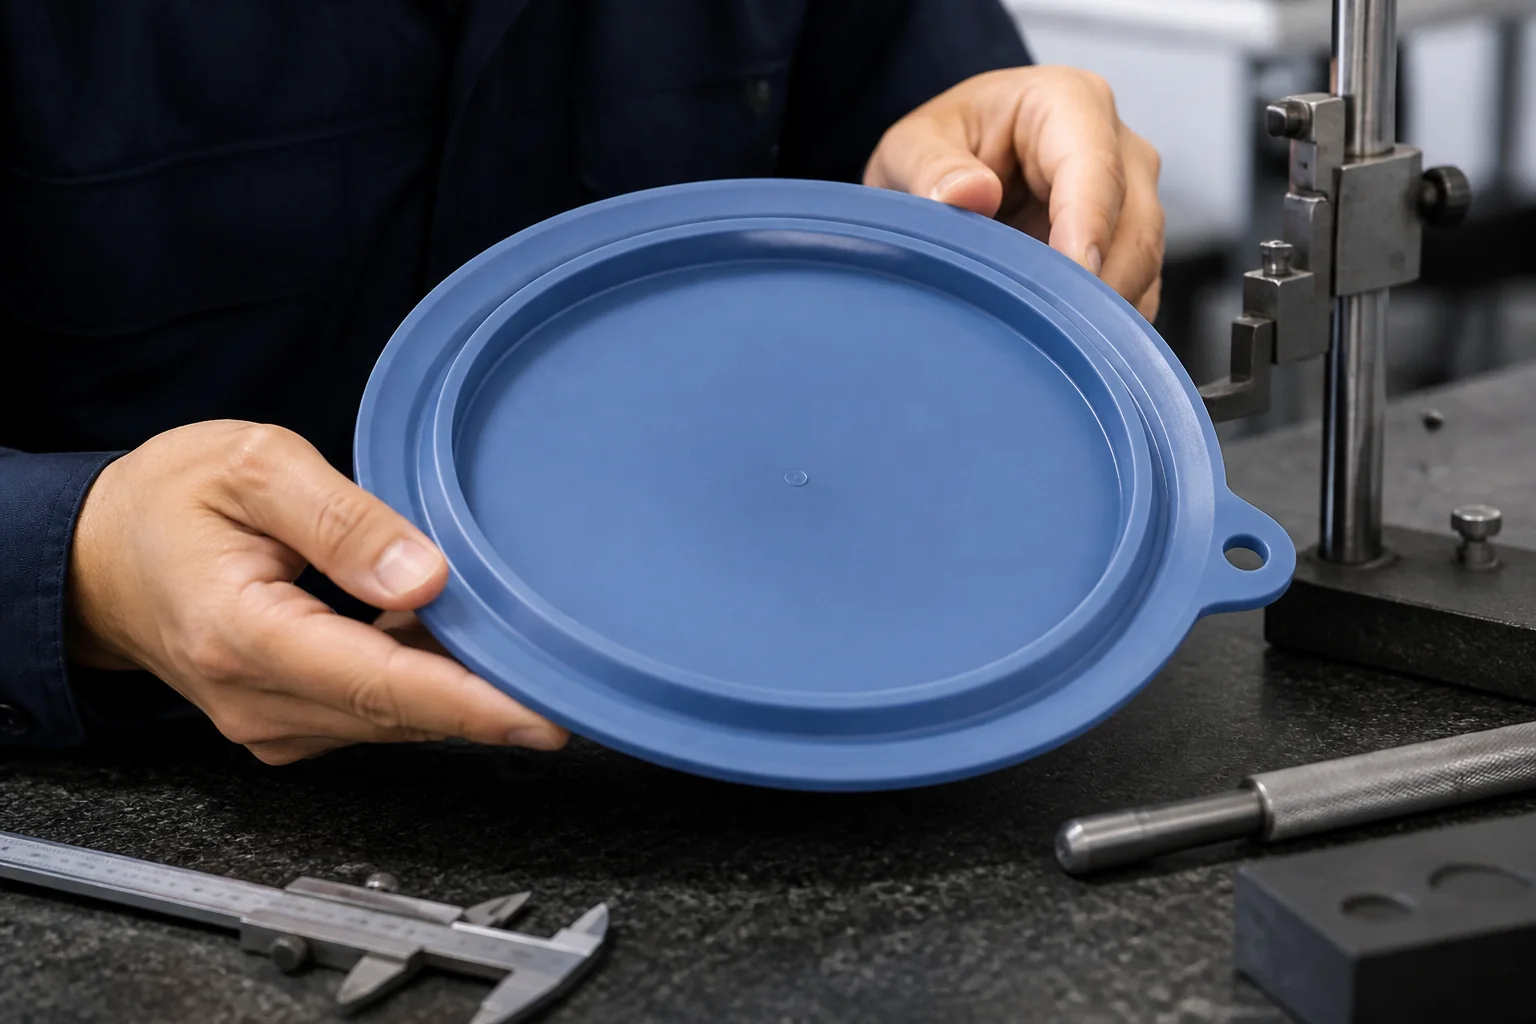
Start a complaint investigation with a reproduction matrix instead of assuming that the consumer or factory is at fault. Compare the returned unit, a retained sample and an approved reference on the complainant’s surface type and on controlled smooth panels.
If all samples fail only on a textured or curved surface, the intended-use statement and surface compatibility may need clarification. If the returned unit fails on every controlled panel while references pass, preserve it for lip, geometry, hardness and contamination analysis.
If one production lot performs differently from retained or golden samples, review material batch, cure, cavity, demolding, trimming, packaging compression and storage. The sample approval workflow provides the controlled reference needed to establish what changed.
User setup remains a product-design input even when the article is within specification. Frequent complaints about activation force, tab placement or normal table finishes can show that the operating window is too narrow for the buyer’s channel.
Use evidence to choose correction, instruction or hold
Corrective action may be surface guidance, a clearer activation instruction, packaging protection, tighter trimming, geometry revision, material or cure control, or a shipment hold. Choose the action that addresses the reproduced failure mechanism rather than the most visible symptom.
For unresolved patterns, send the failed samples and complaint matrix for a factory grip review. Include table photographs, cleaning method, temperatures, load direction, dwell time, lot code and a video of how the seal releases.
Build a Buyer Acceptance Method before Sample Approval
A useful suction test begins with named reference panels that represent the buyer’s channel. Include at least one smooth control surface plus selected sealed wood, laminate, stone, tray or highchair materials, and document finish, flatness and cleaning condition.
Condition panels and samples for a stated time, then use a fixed application procedure. Specify pressure location or force, activation duration, dwell time, load, pull direction, pull rate, repetition count and the rule for repositioning between trials.
Define both functional passes and exclusions. The method can require no spontaneous release for the meal-duration window and a minimum controlled pull result, while stating that porous, deeply textured, damaged or curved surfaces are outside the claim unless separately tested.
Include several samples from each development round and production cavity. Report individual results and failure modes instead of averaging away one recurrent leak location or treating a single exceptional unit as representative.
Approve the method with the product claim and use instructions
Marketing language should match the tested surfaces, setup and duration. If packaging says the plate works on most smooth nonporous tables, the qualification file should show which panels support that statement and which foreseeable exceptions need instruction.
Link the method to the drawing revision, material, hardness range, mold and approved sample. A later design or process change should trigger review before the original grip claim or acceptance limit is reused.
When a Silicone Suction Plate Loses Suction in Production
A factory release plan should monitor inputs that can change the seal: approved compound, hardness, cure condition, critical base dimensions, lip flatness, trimming, contamination and packaging deformation. These checks complement a functional grip test rather than replace it.
Choose inspection frequency from cavity count, process stability and complaint risk. First-off samples can catch setup changes, in-process checks can detect drift, and final lot sampling can confirm that packaged pieces still meet the approved method.
Store retain samples without compressing or folding the suction base. If trays, dividers or nested stacks apply long-term force to the lip, packaging validation should examine whether storage and transport create temporary or permanent set before sale.
Use the tableware AQL inspection guide to separate workmanship sampling from critical functional decisions. A buyer may set a special grip sampling plan or zero-tolerance rule for a defined critical failure without pretending that every visual defect has the same risk.
Keep repeat-order evidence comparable
Retain panel specifications, conditioning records, sample identities, raw results, photographs and failure modes with each lot. Trend activation force, dwell failures and weak locations so a slow shift is visible before customer returns increase.
Repeat the same method after material, pigment, supplier, tool, cure, trimming, packaging or intended-use changes. Comparable evidence lets procurement distinguish genuine process drift from a change in evaluator, table surface or test technique.
What the Release Symptom Usually Tells the Buyer
Use the symptom to choose the next controlled check instead of jumping straight to a material change. Several causes can coexist, so confirm the mechanism on reference panels and multiple samples before approving corrective action.
| Observed Symptom | Likely Variables | Next Controlled Check |
|---|---|---|
| Never seals on one table | Texture, curvature, debris or incompatible finish | Move to a smooth control panel and inspect edge contact |
| Seals then releases slowly | Small leak path, waviness or delayed edge lift | Mark first lift location and measure dwell time |
| Slides without lifting | Low friction, oil, water or side load | Clean and dry both surfaces, then control lateral force |
| Peels from the release-tab side | Tab interference or local lip geometry | Check tab position, folding and nearby surface features |
| Passes empty but fails when loaded | Off-center moment or inadequate structural margin | Repeat with defined mass and load position |
| Fails warm but passes at room temperature | Thermal compliance, moisture or panel interaction | Condition both plate and support at stated temperatures |
| Only one cavity or lot fails | Tool, cure, trimming, contamination or deformation variation | Trace cavity and lot, then compare dimensions and hardness |
| Grip declines after storage | Packaging compression or permanent set | Test unpacking recovery and stored lip flatness |
Eight Buyer Checks before Approving Suction Performance
Use this checklist at RFQ, sample approval and production release. An unanswered item should become a controlled trial or specification action, not a general promise that the plate has strong suction.
| Check | Question | Why It Matters |
|---|---|---|
| Target surfaces | Are representative smooth, laminate, sealed wood, stone or tray panels named? | Grip depends on the actual interface, not the plate alone. |
| Surface condition | Are flatness, texture, cleanliness, dryness and temperature controlled? | Small leak paths and films can dominate the result. |
| Activation | Is pressure location, force or method and activation time repeatable? | Evaluators need to create the initial seal consistently. |
| Load and direction | Are mass, position, dwell time and vertical or lateral force defined? | Real meals introduce peeling moments that a simple pull may miss. |
| Base design | Are diameter, cavity, lip, wall thickness and release tab controlled? | Geometry determines air displacement, conformity and leak resistance. |
| Material state | Are compound, hardness, cure and conditioning linked to the sample? | Stiffness and recovery change the operating window. |
| Variation | Are multiple samples, cavities and production stages represented? | One development sample cannot prove repeat-order consistency. |
| Claim and release | Do packaging instructions and lot criteria match the tested conditions? | Commercial promises should not exceed the approved evidence. |
1. Diagnostic control: Target surfaces
For Target surfaces, answer “Are representative smooth, laminate, sealed wood, stone or tray panels named?” for the intended buyer program. List every surface family that matters commercially and select physical panels with controlled finish and flatness.
Grip depends on the actual interface, not the plate alone. An undefined promise such as “works on tables” cannot produce a repeatable qualification or fair complaint decision.
2. Diagnostic control: Surface condition
For Surface condition, answer “Are flatness, texture, cleanliness, dryness and temperature controlled?” for the intended buyer program. Clean, rinse and dry the plate and panel with a documented method before each controlled comparison.
Small leak paths and films can dominate the result. This removes crumbs, oil, detergent film and moisture as hidden variables while preserving a separate realistic-use trial.
3. Diagnostic control: Activation
For Activation, answer “Is pressure location, force or method and activation time repeatable?” for the intended buyer program. Train evaluators to press the same zone for the same time and record any force fixture used.
Evaluators need to create the initial seal consistently. A narrow activation window can be a usability risk even when one experienced operator creates a strong seal.
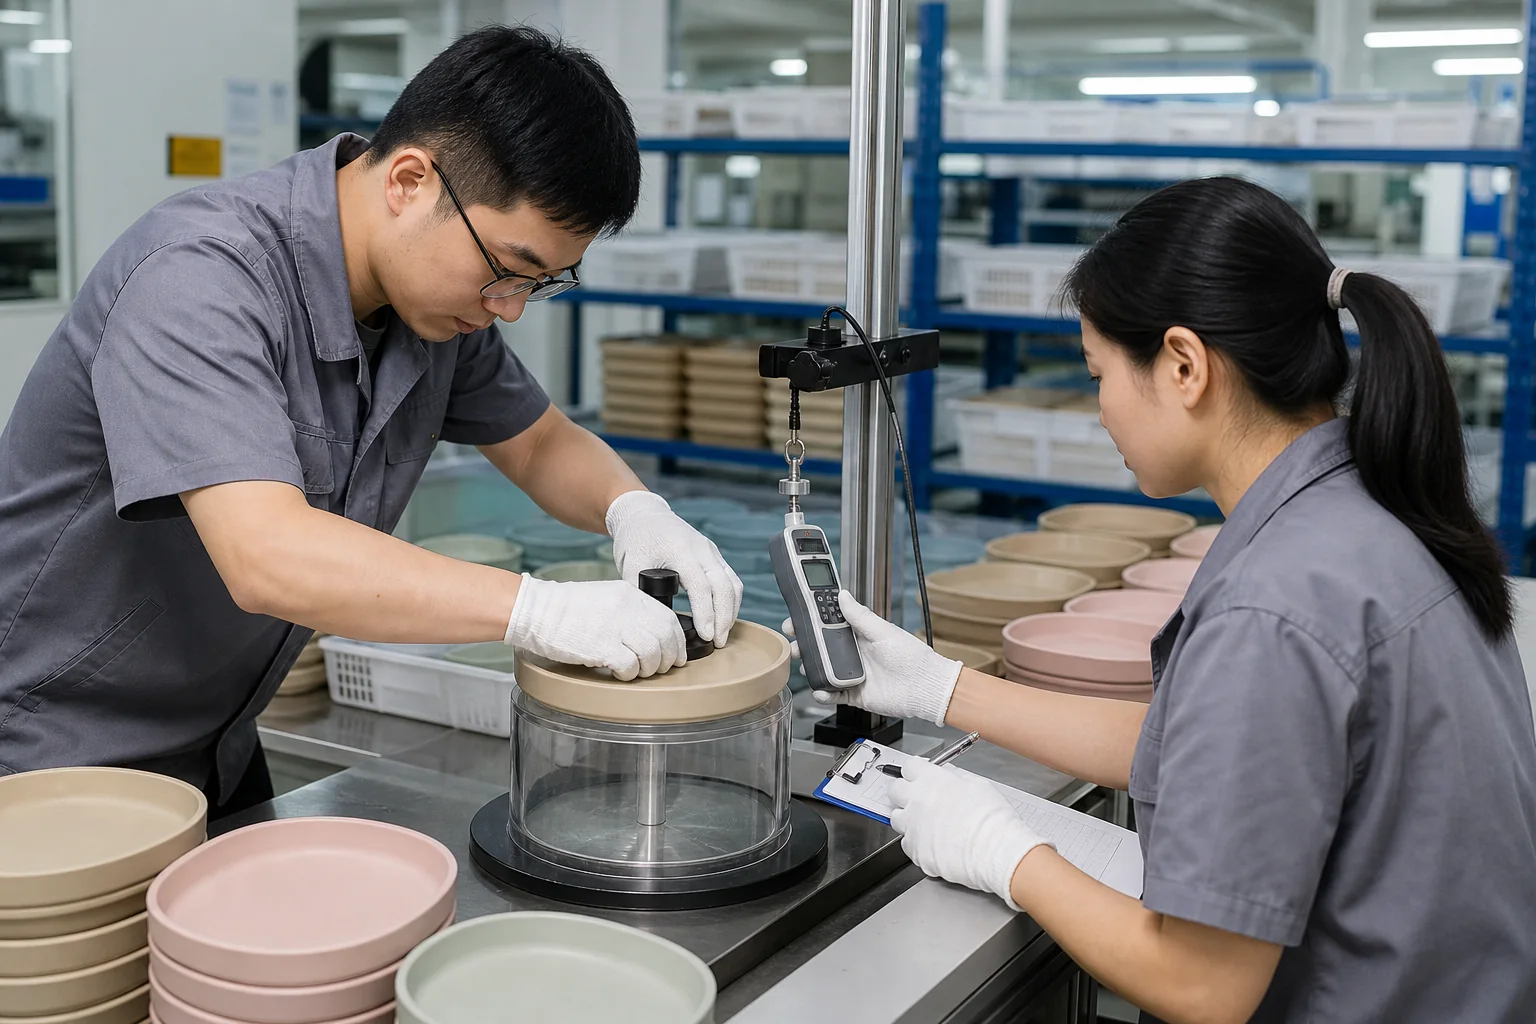
How to test when a silicone suction plate loses suction
For Load and direction, answer “Are mass, position, dwell time and vertical or lateral force defined?” for the intended buyer program. Apply the commercial mass centrally and off-center, then use vertical, lateral and peel-oriented challenges as relevant.
Real meals introduce peeling moments that a simple pull may miss. Different force directions reveal whether the base holds pressure or loses the edge seal during a real meal.
5. Diagnostic control: Base design
For Base design, answer “Are diameter, cavity, lip, wall thickness and release tab controlled?” for the intended buyer program. Measure the complete relaxed lip and base profile, then link dimensions to the drawing and mold cavity.
Geometry determines air displacement, conformity and leak resistance. Nominal diameter alone cannot show how the membrane activates or where a leak path begins.
6. Diagnostic control: Material state
For Material state, answer “Are compound, hardness, cure and conditioning linked to the sample?” for the intended buyer program. Record compound identity, hardness, cure, conditioning and temperature beside the functional result.
Stiffness and recovery change the operating window. The same geometry can behave differently when stiffness, recovery or thermal state changes.
7. Diagnostic control: Variation
For Variation, answer “Are multiple samples, cavities and production stages represented?” for the intended buyer program. Sample across development rounds, cavities, first-off, in-process and packaged production as risk requires.
One development sample cannot prove repeat-order consistency. Variation evidence prevents a best-case prototype from becoming the only basis for repeat-order acceptance.
8. Diagnostic control: Claim and release
For Claim and release, answer “Do packaging instructions and lot criteria match the tested conditions?” for the intended buyer program. Write the compatible surfaces, activation instructions, dwell criterion, exclusions and release authority together.
Commercial promises should not exceed the approved evidence. Aligned claims and factory controls give customer service and quality the same decision rule.
Authoritative Principles behind the Diagnostic Method
These sources explain pressure, vacuum measurement and hygienic surface control, but none is a finished suction-plate standard. Buyers still need a product-specific method that reflects their surfaces, loads, temperatures and claims.
Official Sources and Test Boundaries
NASA Glenn: Pressure explains pressure as force acting over an area and relates pressure differences to resulting forces. This supports the basic reason a sealed suction base can hold, while the actual grip still depends on how well the plate preserves that pressure difference.
NIST: Pressure and Vacuum Metrology describes traceable measurement of vacuum and pressure across controlled ranges. It is not a consumer tableware test, but it reinforces why buyers should define measurable conditions rather than compare uncalibrated hand pulls.
U.S. FDA: Food Code 2022 provides official model guidance on cleaning and sanitizing food-contact equipment and surfaces. Its hygiene focus is distinct from grip performance, yet it supports documenting a clean, controlled interface instead of using contamination as an unrecorded test variable.
Practical disclaimer: Suction performance varies with product design, surface, setup, temperature, load, wear and test method. This diagnostic guide does not create a universal safety claim, and buyers should set product-specific instructions, validation and risk controls for their market and users.
Follow-Up Questions from Suction Plate Buyers
Should a silicone suction plate stick to every table?
No. Deep texture, porosity, curvature, joints and damaged finishes can prevent a continuous seal, so buyers should state the compatible surface range and validate representative panels.
Does wetting the base prove that the design works?
Not by itself. A light film can change conformity or leak behavior, but excess water may cause sliding and can mask weak dry performance or unrealistic consumer instructions.
Is a wider suction base always stronger?
Only when the wider area remains sealed and the geometry can be activated reliably. Lip continuity, stiffness, cavity shape, load direction and surface compatibility can outweigh nominal diameter.
Can Shore hardness alone predict suction grip?
No. Hardness interacts with wall thickness, profile, cure, temperature and deformation, so it should be assessed with dimensional and functional evidence.
What evidence should accompany a suction complaint?
Provide lot and cavity identity where available, surface photos, cleaning and drying method, plate temperature, load, dwell time, application steps and a video showing the first release point. Include a retained or approved reference for comparison.
Turn a Weak Grip Complaint into a Controlled Decision
When a silicone suction plate loses suction, first reproduce the release on named panels with controlled cleaning, activation, load, temperature and dwell time. The observed failure mode then directs the buyer toward surface guidance, lip inspection, geometry and hardness measurement, process review or packaging recovery.
Approve the operating window rather than one best-case pull. A robust sourcing decision states where the plate should work, how users create the seal, what factory variables are controlled and which repeatable result releases the lot.
Carry the same method from prototype through production and complaints. Comparable data gives the buyer a practical route to improve instructions, correct the product or hold a shipment without guessing at the cause.
Request a Suction Performance Factory Review
Share the plate drawing or sample, target table surfaces, intended load, complaint evidence and current grip method. The Naike Group manufacturing team can help map the failure mode to design, material, molding, packaging and validation questions before the next approval.
Request a Custom Quote
Share your product, quantity, target market and customization needs. Our factory team will reply with the next practical step.
Continue Your Sourcing Research
The six newest factory-side articles are updated automatically by publication date.
Wheat Straw vs Bagasse Tableware: Buyer Comparison
A B2B decision guide comparing reusable wheat-straw polypropylene composite tableware with molded bagasse fiber formats across use, evidence, operations and end of life.

Can Wheat Straw Tableware Be Recycled? Buyer Q&A
A practical buyer answer on whether reusable wheat-straw composite tableware can enter PP recycling streams, which evidence matters, and how to qualify market claims.

Global SKU vs Regional SKU: Tableware Decision Guide
A buyer decision framework for choosing one global tableware SKU or controlled regional variants across compliance, packaging, logistics, inventory and change control.

Australia Food Packaging Evidence: Buyer Guide
A practical evidence guide for Australian food-packaging buyers covering intended use, migration risk, supplier assurance, testing, hygiene, release and change control.
EU PPWR Tableware Packaging vs Conventional Packs
A buyer comparison of PPWR-ready and conventional tableware packaging across product protection, material choices, empty space, evidence, labeling and release timing.

Prop 65 Tableware Requirements: Buyer Q&A
A practical buyer Q&A for defining California Proposition 65 exposure scenarios, evidence, warning decisions, supplier records and release controls for tableware.