Custom Mold Development for Tableware: Cost, Timeline, and Risk Control
If you have a tableware product idea and no mold, you are at the most important decision point of your entire project.
The mold determines your unit cost, your production speed, your quality consistency, and your long-term margin. A well-built custom mold pays for itself within the first production run. A poorly designed one quietly bleeds money for years.
China's injection molding industry now ships first-article orders with new tooling in six to ten weeks from RFQ to the buyer's dock, according to Haizol's 2026 China injection molding industry report. The speed is an advantage — if you know how to manage the process.
This guide walks through the full custom mold development workflow for tableware: design, steel selection, cost structure, timeline, sampling, contracts, and the risk control points that separate smooth projects from disasters.
Custom Mold Development: The Five-Stage Workflow
Every mold project follows the same five stages. Knowing what happens at each stage keeps you in control.
Stage 1: Design and DFM Review
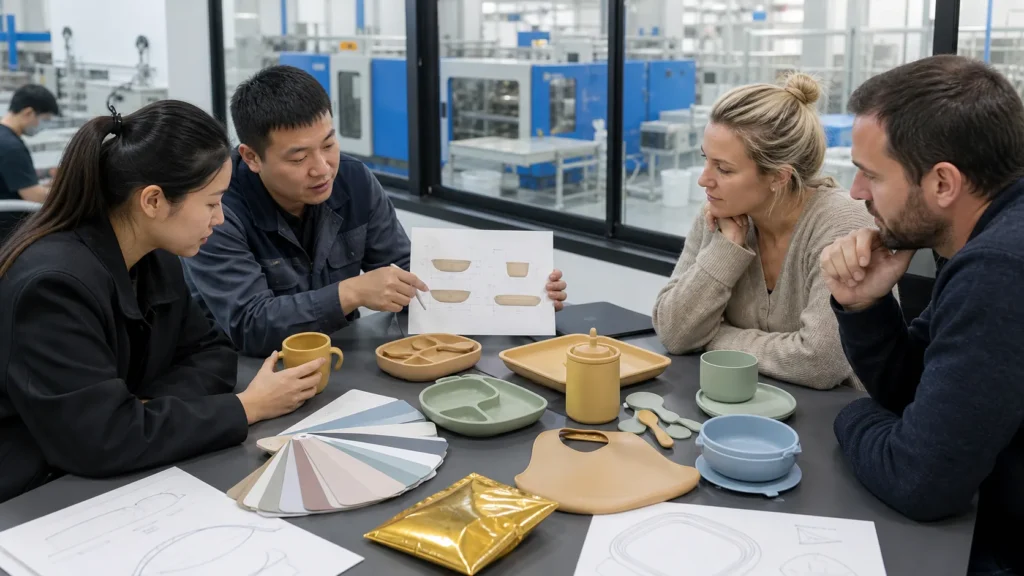
The project starts with your product drawing or 3D model. The factory's engineers review it for manufacturability — wall thickness, draft angles, gate placement, ejection design, and shrinkage compensation.
This design-for-manufacturing (DFM) review is the highest-value step in the entire process. A good DFM review catches problems on screen, where they cost nothing to fix. The same problems found at T1 sampling cost days and money.
Protolabs' 11 tips to reduce injection molding costs covers the common design rules that DFM reviews enforce — eliminating undercuts, removing unnecessary features, and standardizing wall thickness.
Stage 2: Mold Design and Quotation
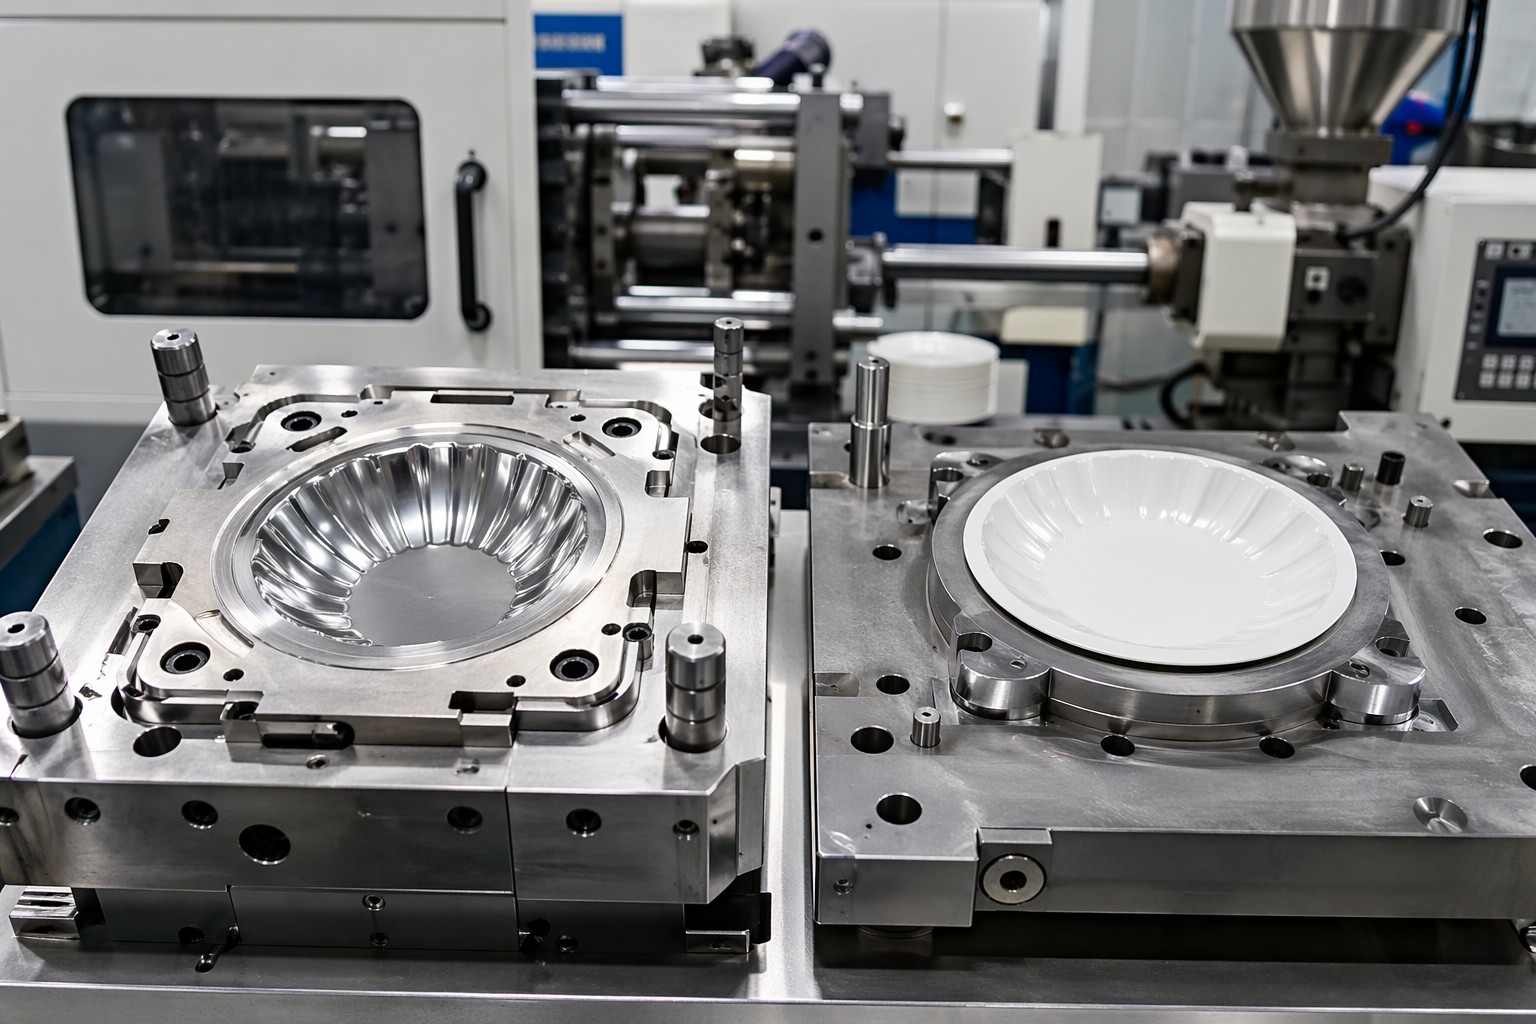
The factory designs the mold structure: cavity layout, runner system, cooling channels, ejection mechanism, and steel grade selection.
At this stage you receive the tooling quotation. Insist on a detailed breakdown: steel cost, machining hours, standard components, assembly, and testing. A lump-sum quote with no breakdown is a quote you cannot evaluate.
Stage 3: Steel Procurement and Machining
Once the design is approved and the deposit is paid, the factory orders steel and begins CNC machining.
This is the longest stage, typically 15 to 30 days depending on mold complexity and cavity count. The machining process — rough cutting, heat treatment, finish cutting, polishing — is where the mold's quality is actually built.
Stage 4: T0, T1, and T2 Sampling
When machining is complete, the mold goes through trial shots. T0 is the first test shot — it confirms the mold fills and opens. T1 follows with dimensional inspection and appearance review against your specification.
T2 comes after mold adjustments, confirming the part meets full production requirements. UTTMould's T1 sample review checklist lists what to check: mold filling, appearance defects, key dimensions, warpage, gate vestige, and ejection marks.
Stage 5: Mold Approval and Production
The mold is approved, the balance is paid, and ownership transfers to you. The mold moves into production, and you begin ordering parts.
This stage also includes the mold acceptance handover — drawings, maintenance documentation, and the final dimensional report.
Mold Steel Selection: P20, H13, or S136
The steel grade is the single biggest cost and quality driver in custom mold development. The right choice depends on your production volume and product requirements.
P20 Pre-Hardened Steel
P20 is the workhorse steel for tableware molds. It is pre-hardened to 28-32 HRC, machines quickly, and delivers mold life of 200,000 to 500,000 cycles.
P20 molds have the fastest lead times — often ready in 15 to 20 days — and the lowest cost, typically 1,000 to 4,000 for a single-cavity tableware mold. It suits most tableware products: plates, bowls, cups, and cutlery with standard production volumes.
H13 Hot-Work Tool Steel
H13 is hardened to 48-52 HRC and delivers 1,000,000-plus cycles. It resists wear, heat, and deformation — essential for high-volume production and abrasive materials like wheat straw composite.
H13 costs more — roughly 2,500 to 8,000 per single cavity — and takes longer to produce because the extra hardening step adds days. It is the right choice for high-volume programs and fiber-reinforced materials.
S136 Stainless Steel
S136 is a corrosion-resistant stainless mold steel. It is the premium choice for food-contact products because it eliminates rust contamination risk and maintains a mirror-polished cavity surface over long production runs.
S136 molds run 4,000 to 12,000 for a single cavity and suit premium food-grade products, transparent parts, and medical-adjacent applications. Hordrt's mold steel selection guide provides a detailed comparison of the three grades across cost, lead time, and durability.
Aluminum Molds for Prototyping
For rapid prototyping or very low volumes, aluminum molds are a valid alternative. They cost 500 to 2,000, machine in days, and deliver 10,000 to 50,000 cycles.
Aluminum is not suitable for production tableware — the soft material wears, the surface degrades, and cycle consistency suffers. But for validating product-market fit before committing to a steel mold, it is the smartest money you will spend.
Custom Mold Cost Breakdown: What You Are Actually Paying For
A mold quotation is not one number. It is the sum of four cost components, and understanding the split lets you negotiate intelligently.
Steel Cost
The raw steel block is 15 to 25 percent of the total mold cost. P20 steel costs roughly 3 to 8 per kilogram. H13 runs 10 to 20. S136 runs 15 to 30. Kingstar Mold's cost guide breaks down steel pricing across grades in detail.
Machining Hours
CNC machining is the largest cost component at 40 to 55 percent of the total. The machining time depends on cavity complexity, steel hardness, and surface finish requirements. Harder steels like H13 and S136 cut slower and cost more per hour.
Standard Components
Ejector pins, springs, guide pins, heating elements, and cooling fittings are purchased components. They account for 10 to 20 percent of the mold cost. Higher quality components extend mold life but add upfront cost.
Assembly, Polishing, and Testing
The final 15 to 25 percent covers mold assembly, cavity polishing, and trial shots. The polishing step is where surface quality is created — a mirror-polished cavity demands skilled hand finishing that cannot be automated.
Indicative Cost Ranges
| Mold Type | P20 Steel | H13 Steel | S136 Steel |
|---|---|---|---|
| Single-cavity plate mold | 1,200–3,000 | 2,500–5,000 | 4,000–7,000 |
| 4-cavity plate mold | 3,500–6,000 | 6,000–12,000 | 10,000–20,000 |
| Single-cavity bowl mold | 800–1,800 | 1,800–3,500 | 3,000–5,000 |
| Complex multi-cavity mold | 5,000–10,000 | 10,000–20,000 | 15,000–30,000 |
These ranges align with current 2026 China tooling pricing. InjectionMoldsChina's 2026 tooling price guide confirms that small molds start around $1,000 and scale with complexity and cavity count.
Mold Lead Times: Planning the Timeline
Typical Lead Times by Stage
| Stage | P20 Mold | H13/S136 Mold |
|---|---|---|
| DFM review and design | 3–7 days | 3–7 days |
| Steel procurement | 2–5 days | 3–7 days |
| CNC machining | 8–15 days | 15–25 days |
| Heat treatment (H13/S136) | — | 3–5 days |
| Polishing and assembly | 4–7 days | 5–10 days |
| T0/T1/T2 sampling | 5–10 days | 7–12 days |
| Total | 22–44 days | 36–66 days |
A standard P20 single-cavity tableware mold ships in 25 to 40 days from design approval. Multi-cavity and hardened steel molds take 45 to 70 days. Factor in sea freight of 20 to 35 days and your full project timeline is 60 to 90 days from RFQ to container loading.
Why Lead Times Slip
Three causes account for most delays. First, design changes after mold fabrication starts — the single most expensive mistake in mold development. Second, insufficient cooling channel design, which causes trial-shot failures and rework. Third, sampling iterations that exceed the planned T1/T2 cycle because the DFM review was rushed.
Compressing the Timeline
Order the steel before the final design approval if your design is 95 percent locked. Pre-book production capacity for the sampling stage. And agree on a penalty clause for late delivery — factories with committed deadlines hit them more often than factories with soft ones.
T1 and T2 Sampling: The Quality Gate
Sampling is where the mold's quality is proven — or exposed. The T0/T1/T2 protocol is the industry standard for mold trial validation.
T0: The First Shot
T0 confirms the basic fundamentals: the mold fills, the part ejects, and nothing is mechanically wrong. At T0, expect cosmetic defects — the goal is structure, not perfection.
T1: The Dimensional Review
T1 samples are inspected against your specification. Key dimensions are measured, appearance is reviewed, and the part is tested for warpage, shrinkage, and surface quality.
This is the stage where you must be present — or at minimum, review photos and measurement reports within 24 hours. A delayed T1 review adds days to the entire project.
T2: The Confirmation Shot
T2 validates that the adjustments made after T1 resolved the identified issues. When T2 parts meet the full specification, the mold is approved for production.
What to Check at Every Trial
The complete T1 checklist covers: mold filling and cavity balance, surface appearance and texture, critical dimensions, warpage and flatness, shrinkage, gate vestige, ejection marks, and wall thickness consistency.
Request the full dimensional inspection report with each trial. A factory that cannot produce measurement data is not running a controlled process.
Mold Ownership and Commercial Terms
The commercial terms around mold ownership are where buyers lose the most money. Three clauses protect you.
Mold Ownership Transfer
The mold must transfer to you upon full payment. This is standard practice — if a supplier refuses to include it in writing, walk away.
The ownership clause should cover the mold itself, the CAD files, and the right to move the mold to another factory at any time. Without these three elements, your "custom" mold is effectively the factory's asset.
Non-Use and Non-Disclosure
Your contract should prohibit the factory from using your mold for any other customer and from disclosing your product design to third parties.
Amortization vs. Upfront Payment
Many factories offer to amortize mold cost into the unit price — zero upfront tooling fee, higher per-unit price. This is attractive for cash flow but risky: you lose leverage if you want to switch suppliers, and the hidden tooling cost inflates your margin calculation.
Ask for both options and compare. For programs with committed volumes, upfront payment with separate unit pricing is almost always the better deal.
Our custom manufacturing page details the mold ownership terms and commercial structures we offer on every tooling project.
Custom Mold Development Risk Control Checklist
Before you approve the mold design and pay the deposit, run this checklist:
Request and review the DFM analysis report — reject the mold if wall thickness, draft, or gate design issues are unresolved.
Get a detailed tooling quotation with steel, machining, components, and assembly broken out separately.
Confirm the steel grade in writing, including hardness certification.
Agree on the T1/T2 sampling protocol and the dimensional inspection requirements.
Confirm the mold life estimate in cycles and the maintenance schedule.
Lock the mold ownership, non-use, and CAD file transfer clauses into the contract.
Set a delivery deadline with a penalty clause.
Reserve 10 to 14 days of buffer in your production schedule for sampling iterations.
Common Custom Mold Development Failures and How to Avoid Them
Even experienced factories make mold mistakes. Knowing the failure modes helps you catch them early — or prevent them entirely.
Shrinkage and Warpage
Every polymer shrinks as it cools, and uneven shrinkage causes warpage. The mold must be designed with shrinkage compensation built into the cavity dimensions.
Wheat straw composite shrinks differently than pure PP because the fiber content changes the thermal behavior. A factory that applies standard PP shrinkage values to a wheat straw product will produce warped plates. Ask which shrinkage factor the DFM review used — and why.
Undercut Problems
An undercut is any feature that prevents the part from ejecting straight out of the mold. Undercuts require slides or lifters, which add cost and maintenance burden.
A good DFM review redesigns undercuts away where possible or adds the required slide mechanisms explicitly to the quotation. A mold that fights its own geometry at every cycle is a mold that fails early.
Cooling Channel Insufficiency
Cooling channels control cycle time and part quality. Poorly designed cooling creates hot spots — areas that cool slowly, shrink unevenly, and warp.
Fast-cycle molds have conformal cooling channels that follow the part contour. They cost more to machine but cut cycle time by 20 to 40 percent. For high-volume tableware, the cycle-time saving pays for the cooling design within months.
Gate Vestige and Cosmetic Defects
The gate — where molten material enters the cavity — leaves a small mark on the part. Gate placement determines whether that mark lands on a visible surface.
For tableware, the gate should be placed on the underside or an edge that is rarely seen. A gate placed on the eating surface is a design error that no amount of polishing fixes.
Surface Finish Failures
The cavity polish determines the part surface. A spec that says "smooth finish" without an SPI grade leaves interpretation to the factory — and the factory will interpret it the cheapest way.
Specify the SPI finish grade explicitly: A1/A2 for mirror gloss, B1/B2 for fine matte, C1 for medium matte. Write it into the mold specification sheet.
Mold Maintenance: Protecting Your Tooling Investment
A custom mold is a long-term asset. How it is maintained determines whether it delivers 200,000 cycles or 500,000.
Daily Maintenance
Clean the cavity surfaces after each production shift. Residual material and release agent buildup degrade surface finish and eventually affect part dimensions. Use the release agent specified in the mold documentation — the wrong type causes fouling.
Weekly Maintenance
Inspect cavity surfaces for scratches, pitting, and wear at gate and vent locations. Check ejector pins for alignment and wear. Verify cooling channel flow and temperature uniformity.
Periodic Re-Polishing
Cavity surfaces wear through normal production. Plan for re-polishing every 20,000 to 30,000 cycles for food-contact products, where surface smoothness is critical.
The Maintenance Log
Require a maintenance log from your factory. A factory that documents every service visit treats your mold as an asset. A factory with no records is degrading your tooling silently.
Custom Mold Development FAQ
Q: How much does a tableware mold cost?
A single-cavity P20 mold costs 800to800to3,000 depending on product complexity. Multi-cavity and hardened steel molds run 3,500to3,500to30,000. The cost is driven by steel grade, cavity count, and surface finish requirements. For a precise estimate, request a custom mold development quotation with a full cost breakdown from your supplier.
Q: What is the first step in custom mold development for tableware?
The first step is always the DFM review. The factory analyzes your product drawing for manufacturability — wall thickness, draft angles, gate placement, and shrinkage. A proper DFM review happens before any steel is ordered, and it is the highest-leverage step in the entire custom mold development process.
Q: How long does custom mold development take?
A standard P20 mold takes 25 to 40 days from design approval. Hardened steel molds take 45 to 70 days. Add 10 to 14 days for T1/T2 sampling and 20 to 35 days for sea freight — plan 60 to 90 days total.
Q: Can I get a cheaper mold?
You can reduce mold cost by simplifying the design, choosing P20 steel, reducing cavity count, or accepting a coarser surface finish. But cutting the wrong corner — thin steel, missing cooling, skipped DFM — costs more in production than it saves in tooling.
Q: Who owns the mold after payment?
You do, if the contract says so. Mold ownership transfer upon full payment is standard practice. Always get it in writing along with CAD file transfer and non-use clauses.
Q: What is the difference between T0, T1, and T2 samples?
T0 is the first test shot confirming the mold fills and ejects. T1 is the dimensional and appearance review against specification. T2 confirms that post-T1 adjustments resolved all issues — the mold is then approved for production.
Q: Can I change the design after the mold is made?
Small changes — surface texture, minor dimensions — may be possible with cavity modifications. Major changes require a new mold. Lock the design before fabrication; changes after machining starts are the most expensive mistake in mold development.
Q: How do I choose between single-cavity and multi-cavity?
Match the cavity count to your annual volume. Under 20,000 units per year, single cavity is usually enough. From 20,000 to 100,000 units, two to four cavities amortize well. Above 100,000 units, invest in six to eight cavities or an LSR injection setup.
Making Your Custom Mold Development Decision
Custom mold development is a 60-to-90-day commitment and a four-to-five-figure investment. The process rewards preparation and punishes shortcuts.
Buyers who succeed follow the same pattern: lock the design before starting, choose the steel grade for their real production volume, review the DFM report carefully, show up for T1 sampling, and put every commercial term in writing.
If you are planning a custom mold project for tableware — wheat straw, silicone, or plastic — we can provide mold design recommendations, detailed tooling quotations with full cost breakdowns, and a realistic production timeline for your specific product. Reach out through naikegroup.com.
Get A Qutoe